A Straightforward Guide to Implementing Authentication in Your Next.js App
This guide showcases the simple procedure of integrating authentication into your Next.js app using the next-auth.js library [https//next-auth.js.org/]. While the library offers various options (providers), this tutorial specifically covers the implementation with the Google Provider. Additionally, you will learn how to easily set up protected routes within your application, making it a seamless task.
Learn how to set up authentication and protected routes in Next.js 13 using next-auth.js.
Authentication is an essential aspect of any web application, and in this guide, we’ll show you how to incorporate it into your Next.js app using the next-auth.js library. But hold on, we’re not just going to give you a boring step-by-step tutorial. We’ll make it fun and engaging with our unique blend of humor and expertise.
Getting Started with next-auth.js
Once your Next.js application is up and running, it’s time to dive into the exciting world of authentication. But before we begin, let’s clarify a couple of things. Throughout this guide, we’ll refer to the “app” directory, but if you’re using the “pages” directory, don’t worry, the implementation is almost identical. Now that we’ve cleared that up, let’s get started.
The first step is to install the next-auth.js library. Open your terminal and run the following command:
npm install next-authGreat! With the library installed, let’s create the necessary folder structure. In your root app folder, create an “api” folder, and inside it, create an “auth” folder. Finally, within the “auth” folder, create a “[…nextauth]” folder.
Your folder structure should look something like this:
- app
  - api
    - auth
      - [...nextauth]
Now, let’s dive into the code. Inside the “[…nextauth]” folder, create two files: “route.ts” and “options.ts”. These files will handle the routing and configuration for your authentication.
Now that we have everything set up, let’s start by adding some code to the “options.ts” file:
import type { NextAuthOptions } from 'next-auth'
import GoogleProvider from "next-auth/providers/google"

export const options: NextAuthOptions = {
  providers: [
    GoogleProvider({
      clientId: process.env.GOOGLE_CLIENT_ID as string,
      clientSecret: process.env.GOOGLE_CLIENT_SECRET as string,
    })
  ]
}
In this code snippet, we import the necessary modules and define our authentication options. We’re specifically using the Google Provider for authentication, but next-auth.js offers various providers you can choose from.
To use the Google Provider effectively, you need to obtain your clientId and clientSecret. Don’t worry; we’ll guide you through that process in a moment. After obtaining these values, make sure to add them to your .env file as shown below:
GOOGLE_CLIENT_ID=your-client-id
GOOGLE_CLIENT_SECRET=your-client-secret
By default, the .env file should be located at the root folder of your application.
But wait, there’s more! To enhance security, next-auth.js requires a secret key. Generate one by running the following command in your terminal:
openssl rand -base64 32This command will generate a 32-character string. Copy it and add it to your .env file as follows:
NEXTAUTH_SECRET=your-secret-keyTo wrap things up, make sure to restart your application. At this point, the next-auth.js library won’t be actively engaged yet because we haven’t implemented any protected routes. But don’t worry, we’ll cover that next.
Implementing Protected Routes with next-auth.js
Protecting routes in your Next.js app is a breeze thanks to the middleware feature. Here’s how you can do it.
Start by creating a “middleware.ts” file in the root “src” folder. This file will handle the middleware logic for your protected routes.
To protect all your pages uniformly, add the following code snippet to your “middleware.ts” file:
export { default } from 'next-auth/middleware'Alternatively, if you want to selectively secure specific pages, you can use a “matcher” configuration. For example, suppose you only want to protect the home and about pages. In that case, your code would look like this:
export { default } from 'next-auth/middleware'
export const config = {
  matcher: ['/', '/about']
}
Now, when you visit these pages on your localhost, you’ll be prompted with an authentication screen, inviting you to “Sign in with Google” instead of seeing the regular content. It’s like having a bouncer guarding your pages!
Conclusion
Congratulations! In this guide, we’ve covered the steps to seamlessly implement authentication and protected routes in your Next.js application using the fantastic next-auth.js library with the Google Provider. Not only have you learned valuable technical skills, but you’ve also experienced our signature blend of informative and entertaining content.
By following these steps, you’ve laid a solid foundation for integrating authentication into your Next.js application, bolstering its security and enhancing the user experience. And remember, next-auth.js offers multiple providers for authentication, so feel free to experiment and explore beyond Google.
Now, armed with this knowledge, go forth and develop amazing applications that offer secure access control and personalized content based on user authentication. The possibilities are endless!
If you have any questions or want to share your experiences, we’d love to hear from you in the comments below. Happy coding!
Original content source: Securing Next.js Applications with Role-based Authentication via next-auth
Image sources: – Folder structure image: 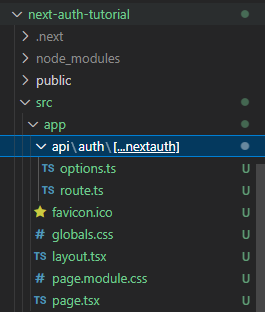 – .env file location image:
 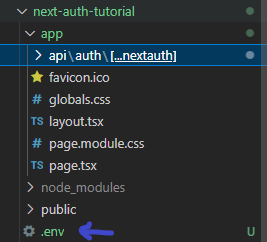 – Google Cloud Platform navbar image:
  – Dropdown menu illustration image:
  – Credentials option image:
  – Consent screen button image:
 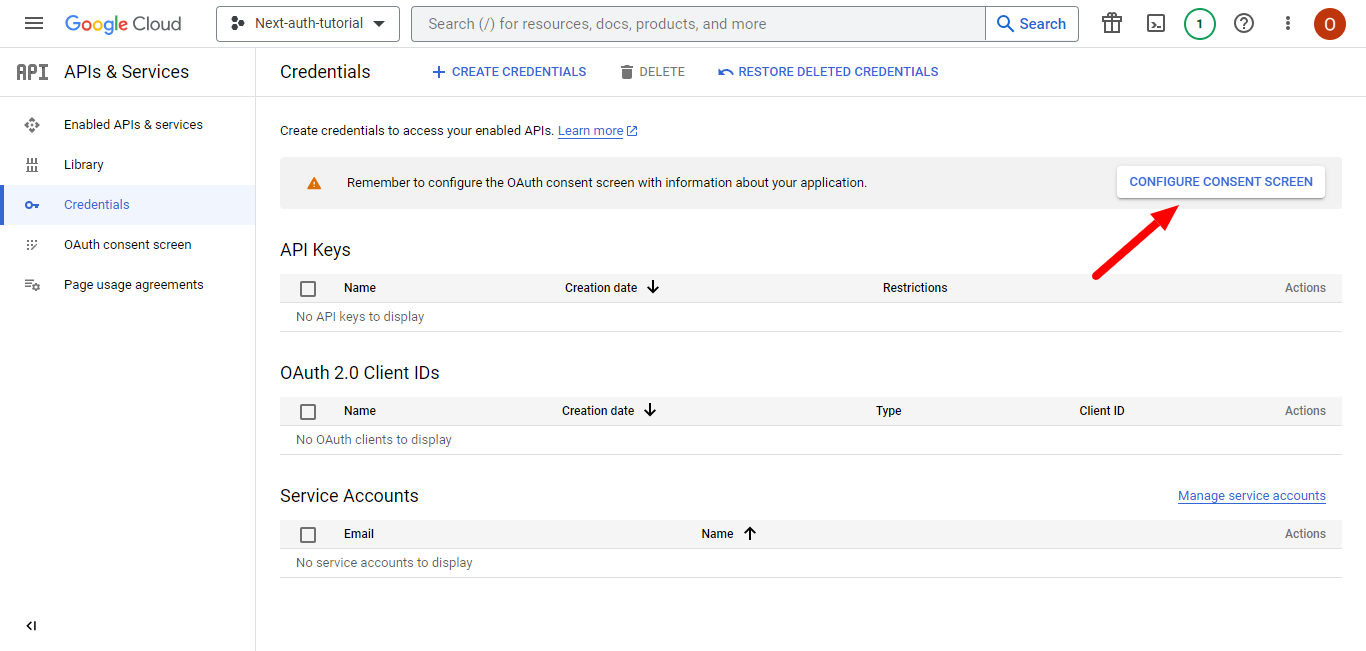 – Consent screen config image:
 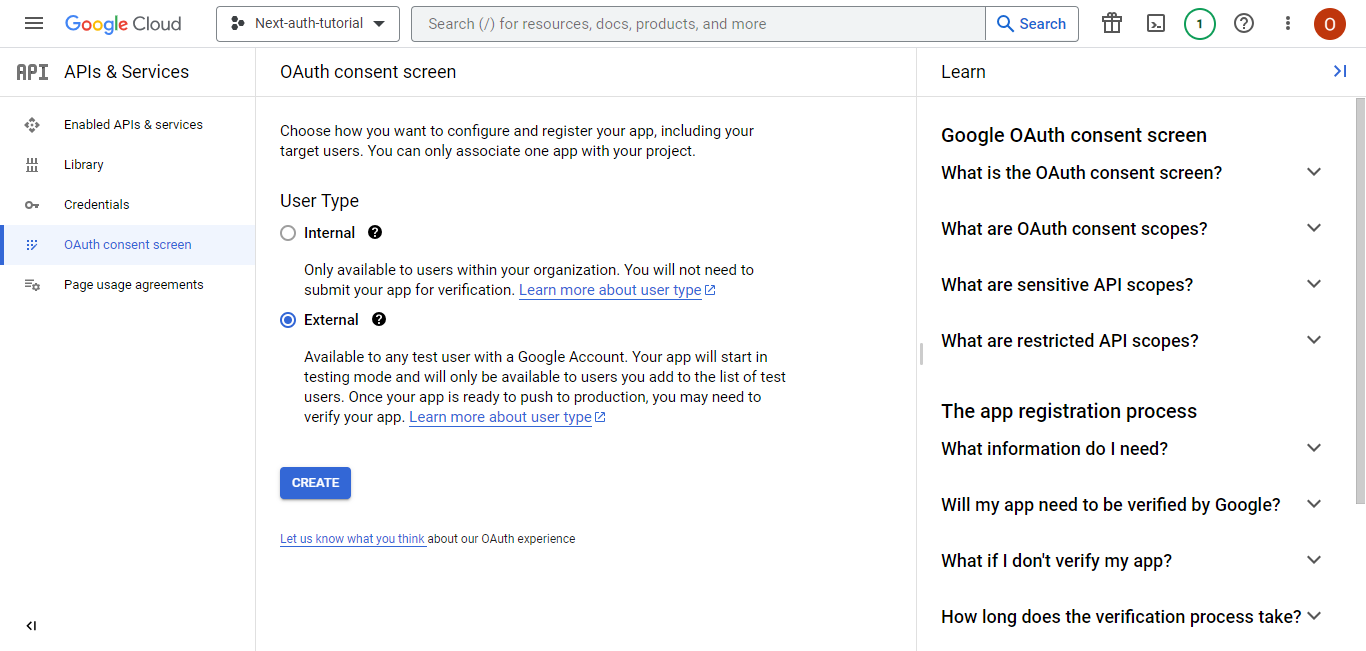 – Dashboard page image:
 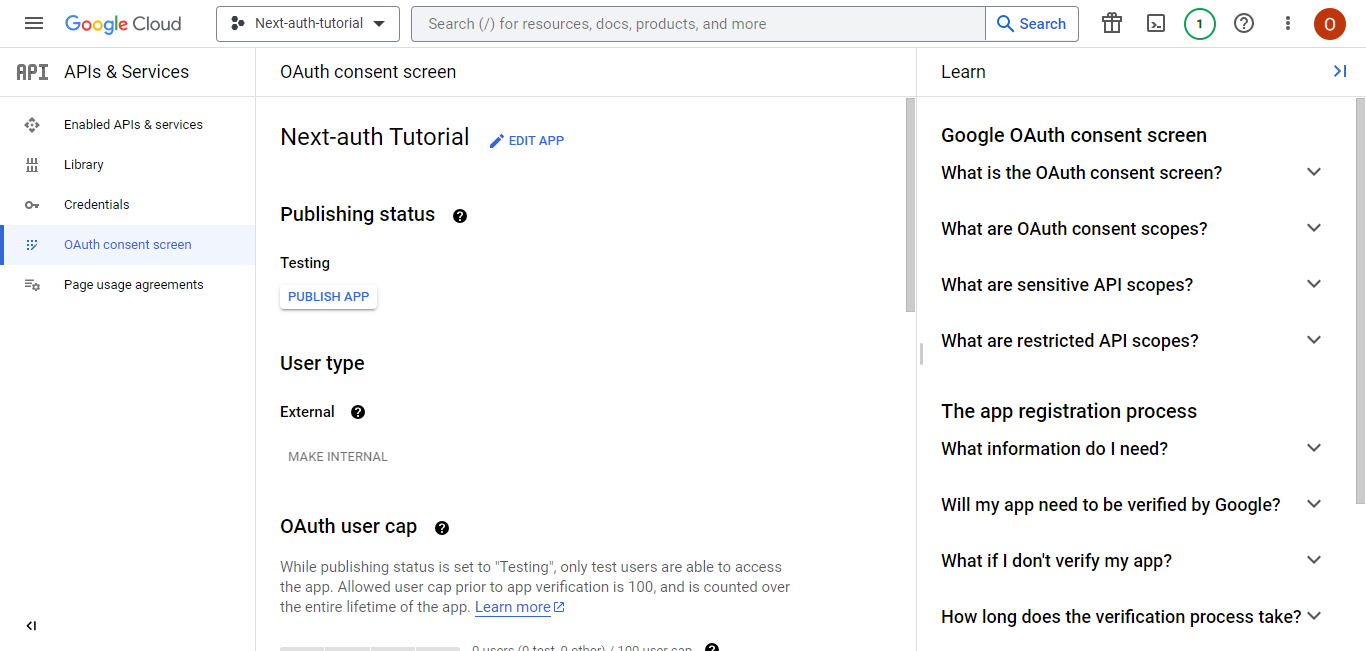 – OAuth Client ID image:
  – Client ID and Client Secret image:
 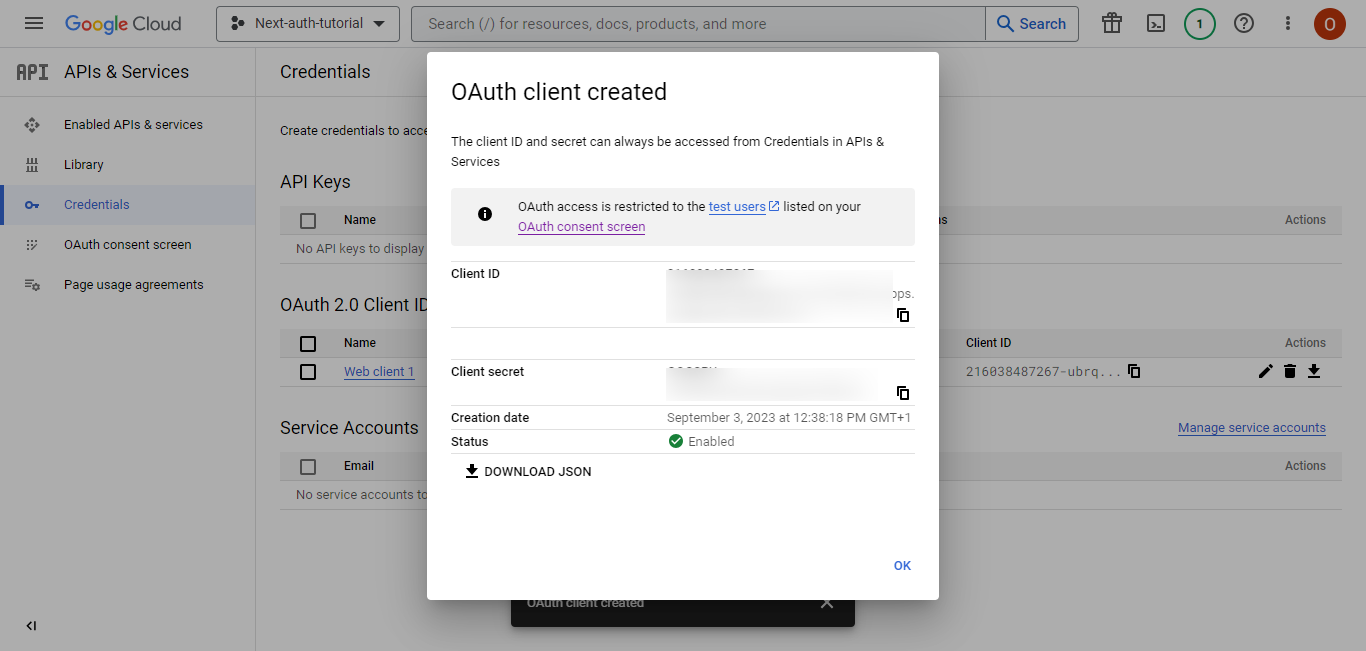 – Authentication prompt image:
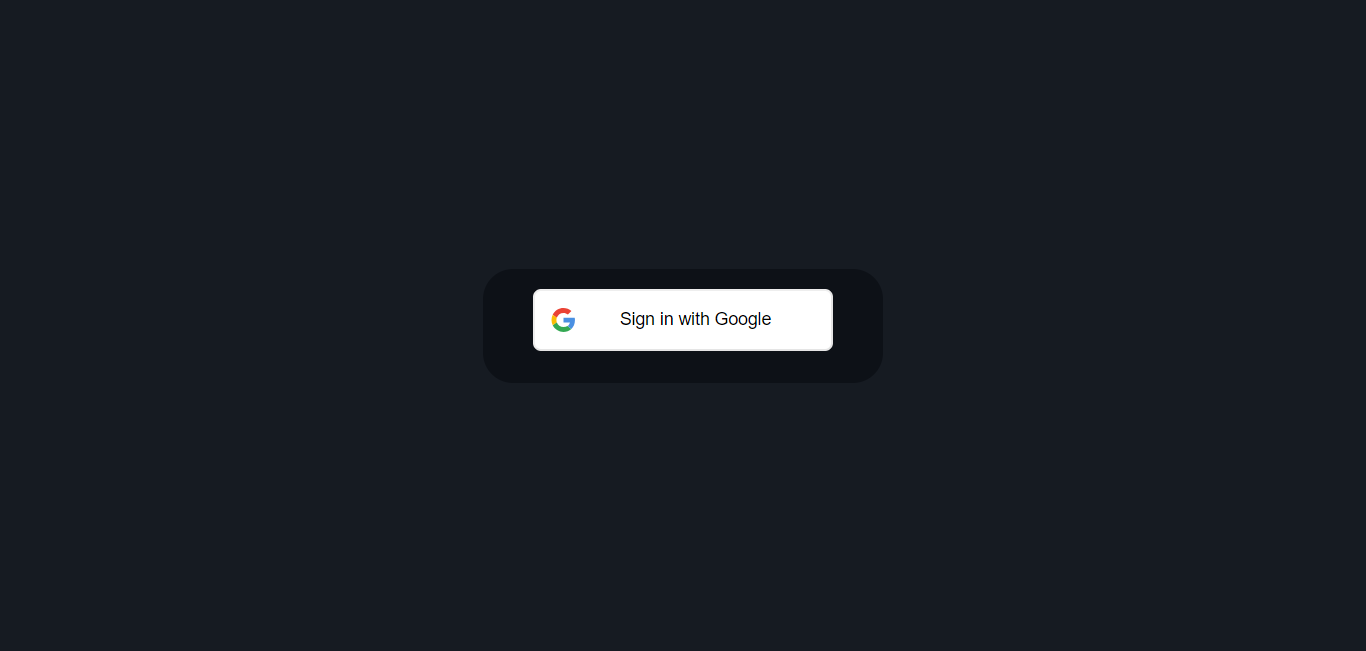


Leave a Reply